2.15.2014

I am READY for Spring, with some help from The Crafters Workshop.


Hi everyone, Monica here with a spring filled project for you.

I really try to step outside the box and inspire you all to use products in different ways.

This week I have The Crafters Workshop Mini Bubble Doily (TCW372s) stencil to work with. 


I started by mixing some Liquitex Course Texture Gel and acrylic paint. I used heavy card stock for the base. I applied the colored texture gel with my pallet knife then dried it using my heat gun. I did the same thing with blue paint and the texture gel, and I also did white with the texture gel onto a Gelli Plate background.


Once the gel dried I used some Tim Holtz ink over the entire background. Orange with the pink, a darker blue with the blue. I then painted the back of the orange/pink with yellow and the back of the blue with pink.  


I then, using the stenciled pattern as a guide, cut it into a spiral, while scalloping the edges. I then rolled them into the roses, leaving the textured stencil pattern on the outside...


The background of the canvas is a Gelli Plate print, the mushrooms are from the Funky Dream Fairies collaboration kit between Marsha Slayer Jorgenson and Nancy Baumiller at deviantscrap.com. The butterfly fairy is from a kit by Kristin Hubick Hello Dollie Nature Fairies available at retrocafeartgallery.com.


The wood tree and birdcage are pieces I picked up at Hobby Lobby  and painted with acrylic paints. 


I had a lot of fun putting this together and love working with The Crafters Workshop stencil.

I'm hoping this project brings Spring a little closer to everyone .

x0x0x
Monica

2.05.2014

Dreams Are Magical

So this week for my design team project I had the Lighthouse mini album from Genuinely Jane Studios http://www.genuinelyjanestudios.com/newsite/cubecart/index.php?_a=product&product_id=877

I did this mixed media piece on an 11x14 canvas.


LET THE MAGIC OF YOUR DREAMS LIGHT YOUR WAY


I added texture to the entire canvas with a heavy  modeling paste. I used different shades of blue for the base and shading. I then added some ink in blue and green. Once I had the background done, I started working on the lighthouse.

I covered the lighthouse with Liquitex Course Texture Gell, then painted diagonal areas of black and white.I love how the red on the roof is so contrasting to the black and white so I added a little red door just cut from corrugated cardboard.

The images of the whale and girl and clouds I used are from Tumble Fish Studio's Dreams Cloud #9 kit, artist Marsha Slayer Jorgensen over at deviantscrap.com. I covered the whale, the clouds, and the hair of the girl in Tattered Angels Glimmer Glam Chandelier. They are super sparkley and magical looking.

I glued the Lighthouse onto the canvas, then added the rocks, which are just from a bag of rocks I picked up in the craft section at Walmart. I then added the whale and the girl, then dry brushed some white highlites around the whale and the waves on the canvas.The last thing I added is the black and white checkered border and lines on the lighthouse. For this I used duct tape!

Close up of Images Dreams Cloud #9 kit by Marsh Slayer Jorgensen Tumble Fish Studios
 deviantscrap.com


  Close up of Lighthouse


 Texture on Light House using Liquitex Course Texture Gel


Background texture using Liquitex Heavy Modeling Paste
                                            
 I had a lot of fun with this project. I hope it inspires you.
Always believe in your dreams and where they can take you.
x0x0x
Monica

1.22.2014

FROG DOG STUDIO AND GENUINLY JANE STUDIOS BLOG HOP


Welcome to the Frog Dog Studio and Genuinely Jane Studios Blog Hop!

This week our design teams are showcasing projects from the Frog Dog Studio 
January Mixed Media Kit, featuring an Exclusive Genuinely Jane Studio Telephone Booth Wood Album.  Both teams are excited to share their kit projects and show you how they were inspired by Genuinely Jane products.

Be sure to follow the blog hop list below as you hop from one blog to the next. Lost?  Return to the Frog Dog Studio blog or the Genuinely Jane Studios blog to see who is next on your hopping list! 
We love Frog Dog Studio kits and Genuinely Jane Studios product so much, we are sharing them with you!  Visit each blog and leave a comment for a chance to win one of the following: 
1.  ONE winner will be selected to receive a $25 Frog Dog Studio Gift Certificate to use in the Frog Dog Studio store.

2.  ONE winner will be selected to receive a $25 Gift Certificate  from Genuinely Jane Studios to use for GJS books in the Genuinely Jane Studios Store

You must visit each blog and leave a comments on all blogs in order to qualify.  
Comments are due by midnight EST, Friday, January 24th to qualify for the drawing. Winners will be announced shortly after the end of the comment period, so be sure to check back to see if you've won.
Let's get hopping!

Here is my version of the Phone Booth...I had so much fun making this. Superman and Wonder Woman bear great significance to my husband and I so I had to fit them in...that's a long story though so I won't go into it LOL...


Some pictures of the process...I printed out the British flag and glued it to the 3 sides of the phone booth.I doodled over the black and white scrapbooking paper with my white signo pen...I love graffitti... I painted the clear beads that came in the mixed media kit with black and used them as the feet on the phone booth...


I really wanted to utilize the stamps as much as possible so I made this tag to send to my son as a reminder to CALL ME, and not always text me. Love how it turned out.


 Have fun hopping and good luck!!!!


Frog Dog Studio (http://frogdogstudio.blogspot.com/)
Genuinely Jane Studios (http://www.genuinelyjanestudios.com)
Susan Wojtkowski (http://irreversiblymoi.com/)
Monica Downing ( http://madzieme.blogspot.com/) (you are here)

1.15.2014

Genuinely Jane Studios Design Team project...Hot Air Balloons

Hey everyone...Monica here...

So I'm super excited to show you all my first project for Genuinely Jane Studio's Design Team.

I used the Hot Air Balloon album to make these 3 air balloons.

The first one is Journey.

I didn't have to do anything to prepare the album. It is nice and smooth and I knew I would be gluing the paper on the wood.

I started by tracing the shape of the Air Balloon onto printer paper. I then drew out the lines and bottom part.

I had some paper I had picked up at Hobby Lobby (the blue/greenish paper) and I traced the basic shape of the balloon then cut it out.

I then cut each individual ruffle of the top part of the balloon from a border paper by Crate Paper. I layered the cut paper onto the blue paper, then cut the edges away. I then just used mod podge to adhere it to the wood base.I picked up some chain at Walmart in their craft section and I used the for the oval above the basket and the chains on the balloon. I then glued Tim Holtz gears above the chains. I used a scrap piece of burlap and created the basket  then glued a couple of gears and a charm to that. I used my dymo labeler and put JOURNEY under the Tim Holtz metal piece at the top of the balloon.


The second balloon I did is Love.

I used papers from a paper pad I have had for a long time. I used a spray adhesive to adhere this paper as it was thinner and I didn't want it to buckle. I then used some open weave mesh and applied it to the top part of the balloon, and a scrap piece of a brown mesh for the edging and started layering the rose and floral cutouts on top of that. I used a cotton ribbon for the balloon wires and the same metal chain for the ring.The roses along the trim are from The Paper Studio. The charm and chain are Tim Holtz. I created the basket from a scrap piece of raw canvas and some lace.


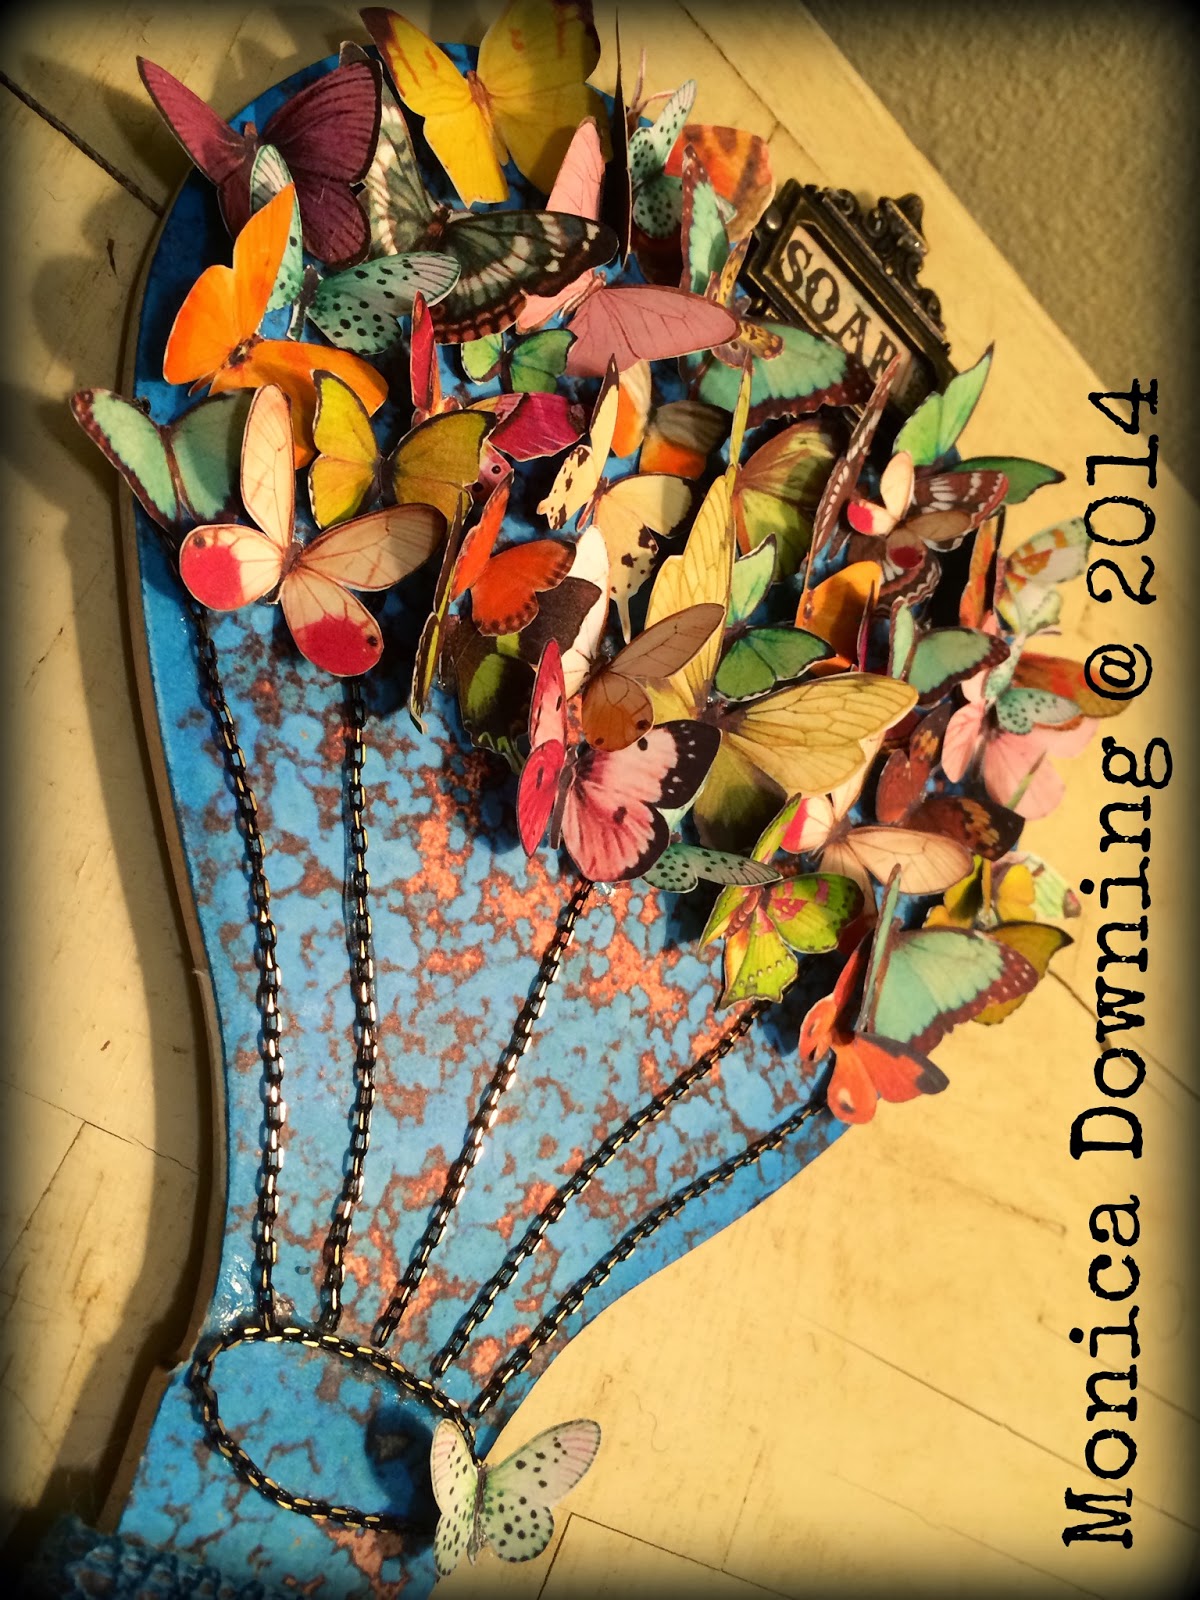
The third balloon I did is SOAR.

All of the butterflies are hand cut by me. The background paper is from loose stock at hobby lobby. I adhered this paper with spray adhesive as well. I then just started layering the butterflies. Had so much fun. I used the chain from Walmart, then created the basket from burlap and some crochet trim. The butterfly charm is actually a piece of Jewelry from the Journey collection at Hobby Lobby.

The back of each balloon has lined scrap paper and I am going to journal about Journey, Love and what makes me Soar, then they will hang from the ceiling in my studio. 


I will be doing the 4th balloon as well and it will be Dream. I will post pictures when I get that done.

I hope this project inspires you to go make a beautiful mess...